Code/CFLite/CFNetwork: Difference between revisions
Jump to navigation
Jump to search
No edit summary |
No edit summary |
||
| Line 1: | Line 1: | ||
This code available on this page is the results of the [https://www. | This code available on this page is the results of the [https://www.upwork.com/ab/applicants/518086268238884864/job-details CFNetwork project on upWork], and the [https://www.upwork.com/ab/applicants/885604832185917440/job-details Conversion to 64bit on upWork]. I hereby release it under the terms of the "[https://en.wikipedia.org/wiki/BSD_licenses#3-clause_license_.28.22Revised_BSD_License.22.2C_.22New_BSD_License.22.2C_or_.22Modified_BSD_License.22.29 New BSD License]". | ||
==How to get started== | ==How to get started== | ||
#Install [http://support.apple.com/kb/DL999 Bonjour Print Services] for Windows. (you do not need to run the printer wizard nor set up a printer, this is just a service that CFTest makes use of) | #Install [http://support.apple.com/kb/DL999 Bonjour Print Services] for Windows. (you do not need to run the printer wizard nor set up a printer, this is just a service that CFTest makes use of) | ||
Revision as of 21:04, 13 July 2017
This code available on this page is the results of the CFNetwork project on upWork, and the Conversion to 64bit on upWork. I hereby release it under the terms of the "New BSD License".
How to get started
- Install Bonjour Print Services for Windows. (you do not need to run the printer wizard nor set up a printer, this is just a service that CFTest makes use of)
- download CFNetwork and put it in your development tree
- using Qt
- open CF/opencflite-476.17.2/CFLite/CFLite.pro
- also open CFTest/project/qt/CFTest/CFTest_win.pro
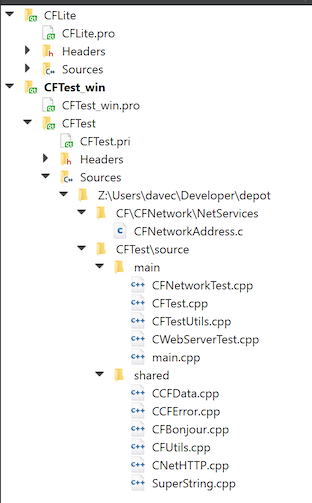
- your "Session" should look like this:
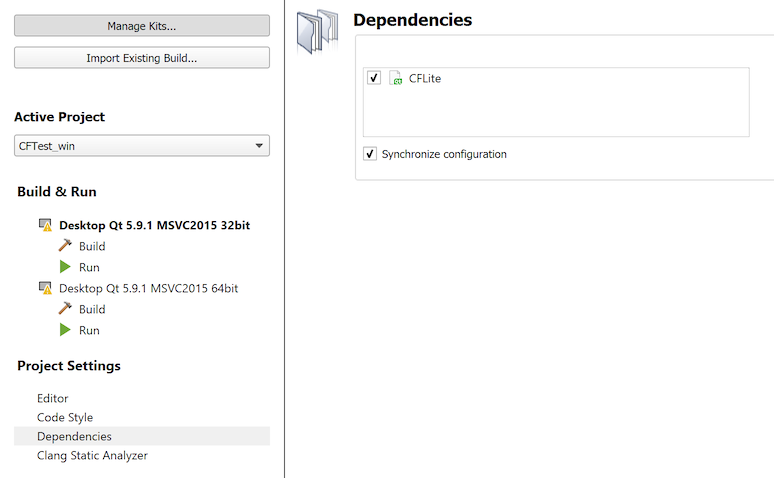
- set CFTest_win to the active project, then set it to depend on and sync with CFLite, like this:
- below screen shots show 64bit debug as an example, but also set up 32bit debug, and also release of both 32 and 64
- how CFLite build settings should look: (ignore run settings)

- how CFTest build settings should look:

- how CFTest run settings should look:

- if you're using Visual Studio
- Open the file "CFNetwork/CFTest/win_vs/CFTest.sln".
- go to "Solution Explorer"
- select "CFTest", right click it and pick "Properties"
- in the "Configuration:" menu, pick "All Configurations"
- go to "configuration properties->debugging"
- set "Command" to "$(SolutionDir)build\$(TargetName).app\Contents\Windows\$(TargetFileName)".
- in VS2010 and later, actually you may need to just specify the full path (in step 4 above), as "$(TargetName)" does not seem to expand correctly for debug vs. release